Download
If you haven't already, make sure you've downloaded and set up the Flare server.
The Explorer source code is part of the Swift sample code. You can also download the application.
Build
If you've downloaded the source, follow the instructions on the developing with Swift page to build the app.
Connect
Launch the app. By default it will connect to the server on localhost using port 1234. If you want to change the server settings, choose Preferences from the Flare application menu, update the server and port, and restart the app.
Outline
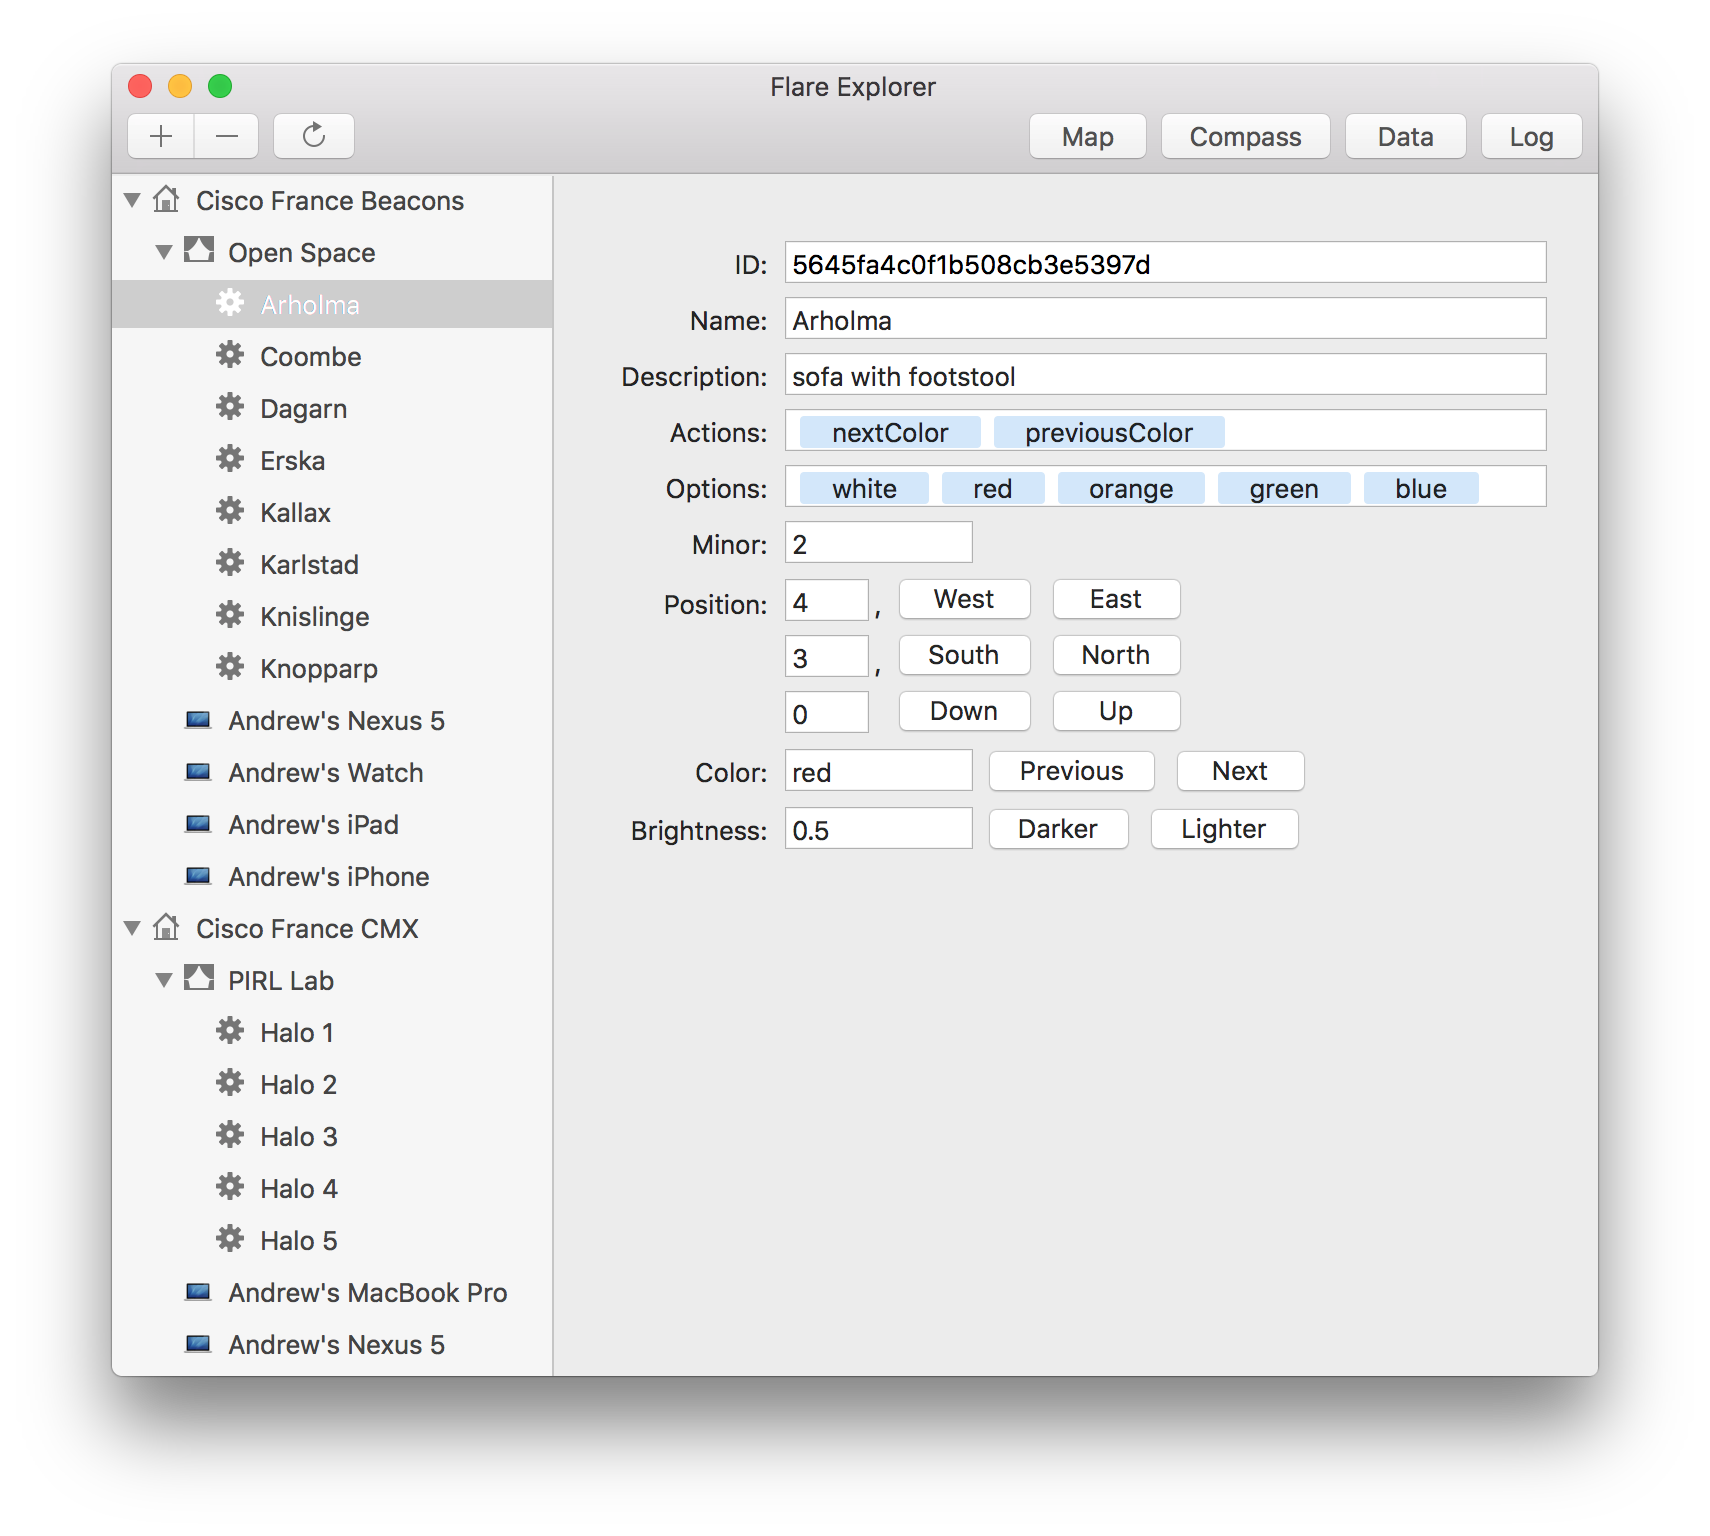
When you start the app, you will see a list of all environments, zones, things and devices in the database. You can click any object to see all of its details.
Importing objects
Don't see any objects? To get an idea of what the Explorer app can do, you can start by importing some sample data.
- If you choose File > Import, you can import a JSON file.
- If you choose File > Export, it will import all the current environments to a JSON file.
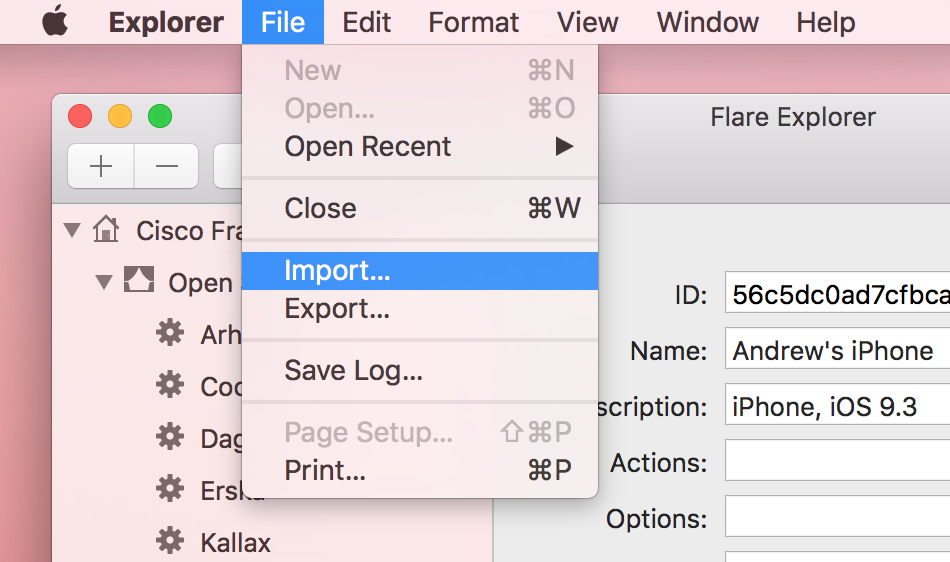
See the environments page for more information on importing the sample objects.
Creating objects
You can use the Explorer app to create Flare objects.
- To add a new environment, make sure nothing is selected (command-click the current selection to deselect it) and click the add button (+) in the toolbar.
- To add a new zone, select an environment and click the add button.
- To add a new thing, select a zone and click the add button.
- The Explorer rapp currently does not support creating a device object. Normally device objects are created by apps themselves.
See the environments page for more information about the properties of each type of Flare object.
You can also delete objects by selecting any object and clicking the delete button (–) in the toolbar.
Editing objects
When you click on an object, it will show all the information about an object, including its ID, name, description, data values, and position. Flare objects have a flexible key/value data store that can hold various objects of any JSON type. For this demo, things have color and brightness data values, and devices have an angle data value.
You can edit any of these values. When you change the name or description, or other attributes that aren't stored in the data or position objects, the app will use the REST API to update the object. When you edit the data or position, it will use the Socket.IO interface.
To edit other data values that the app doesn't know about, click the Data button in the toolbar to edit the raw JSON for the data object.
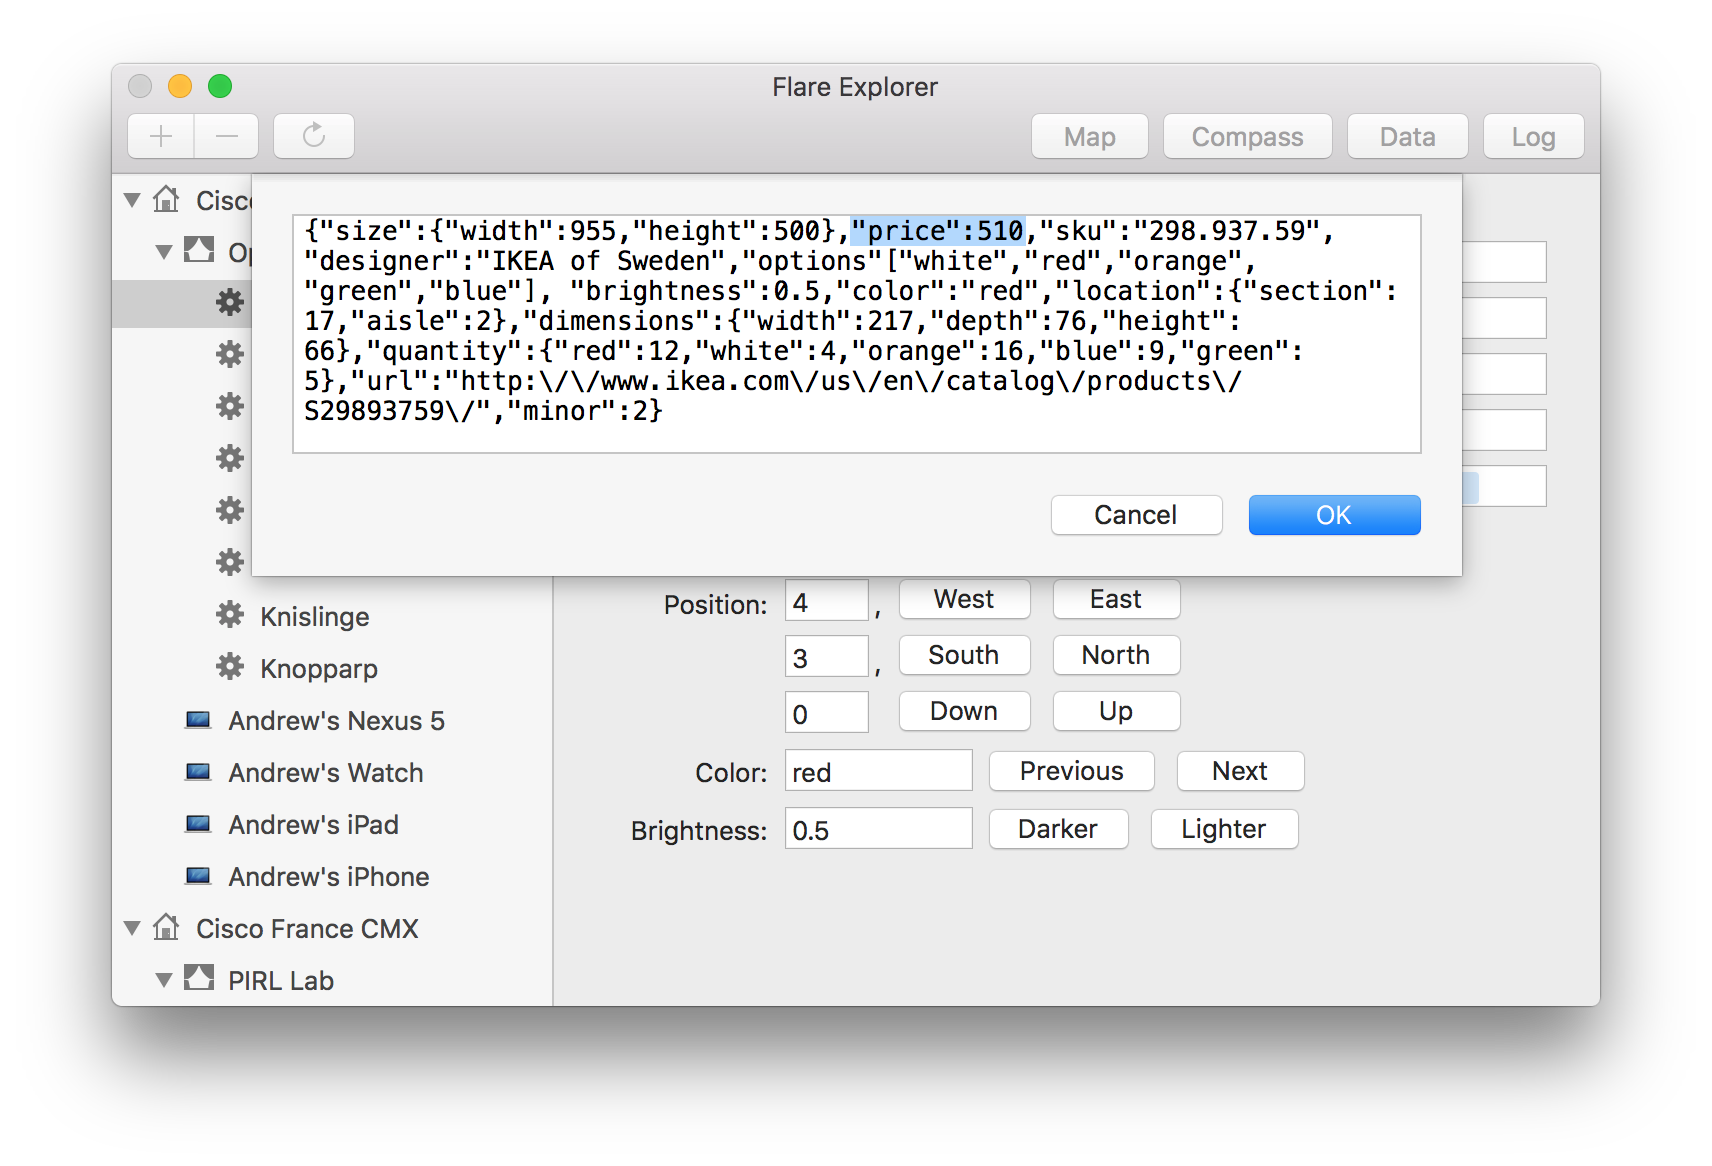
If you want to make bulk changes to objects using a text editor, you can export your data, edit the file, and then re-import the data. Your changes will then be merged into the existing environments.
Map
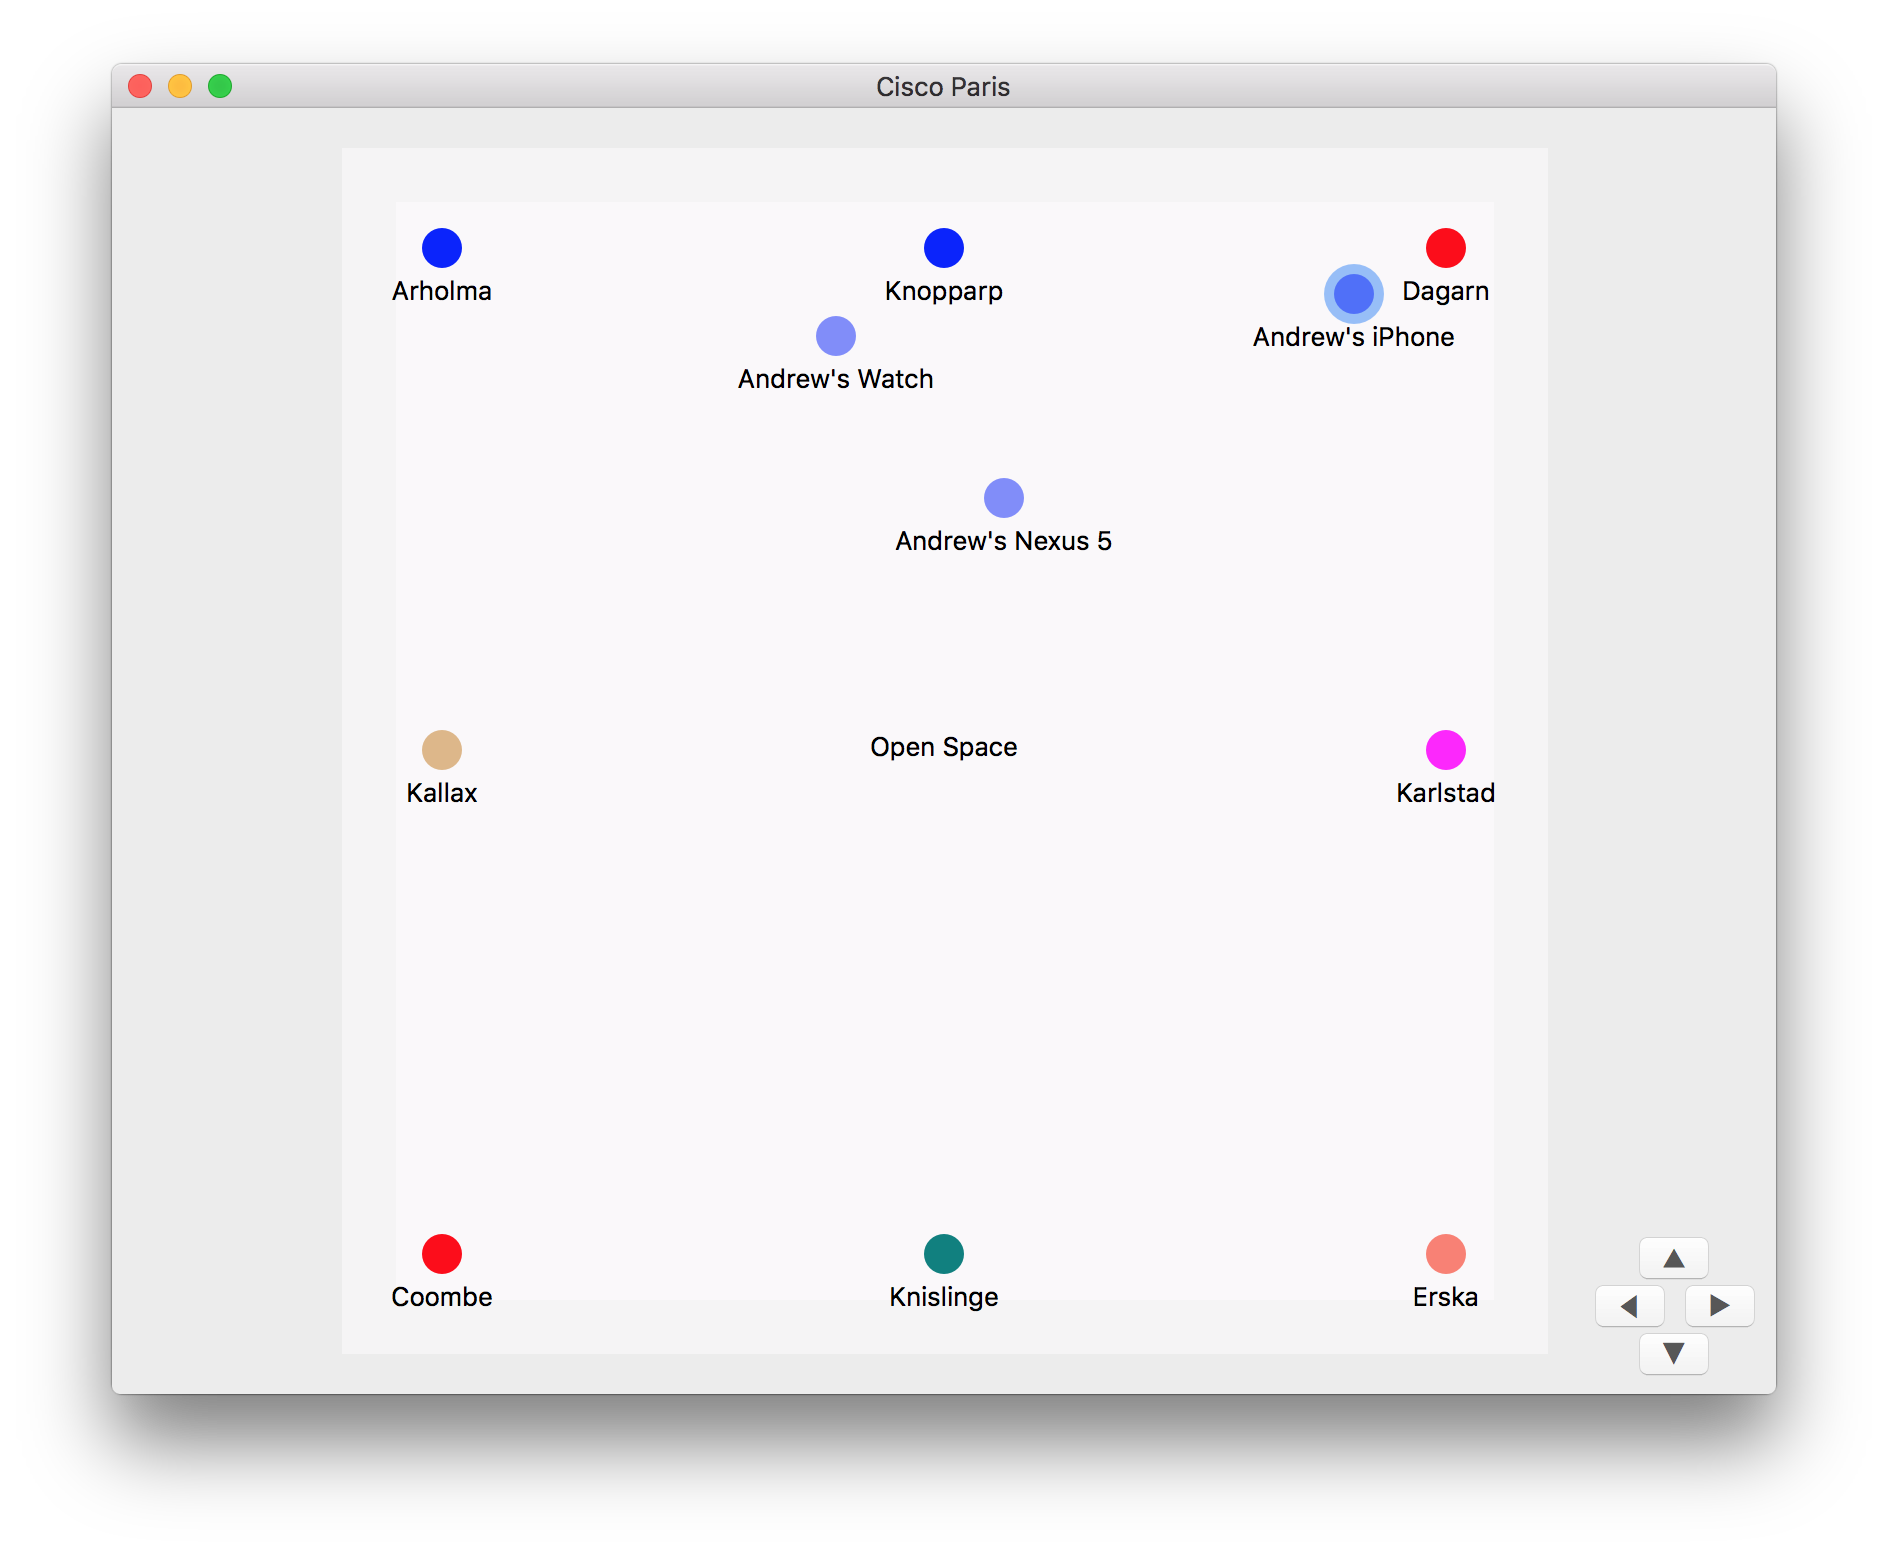
When you click the Map button in the toolbar, it will display a map showing all the zones, things and devices inside. When a device position changes, you'll see it move on the map.
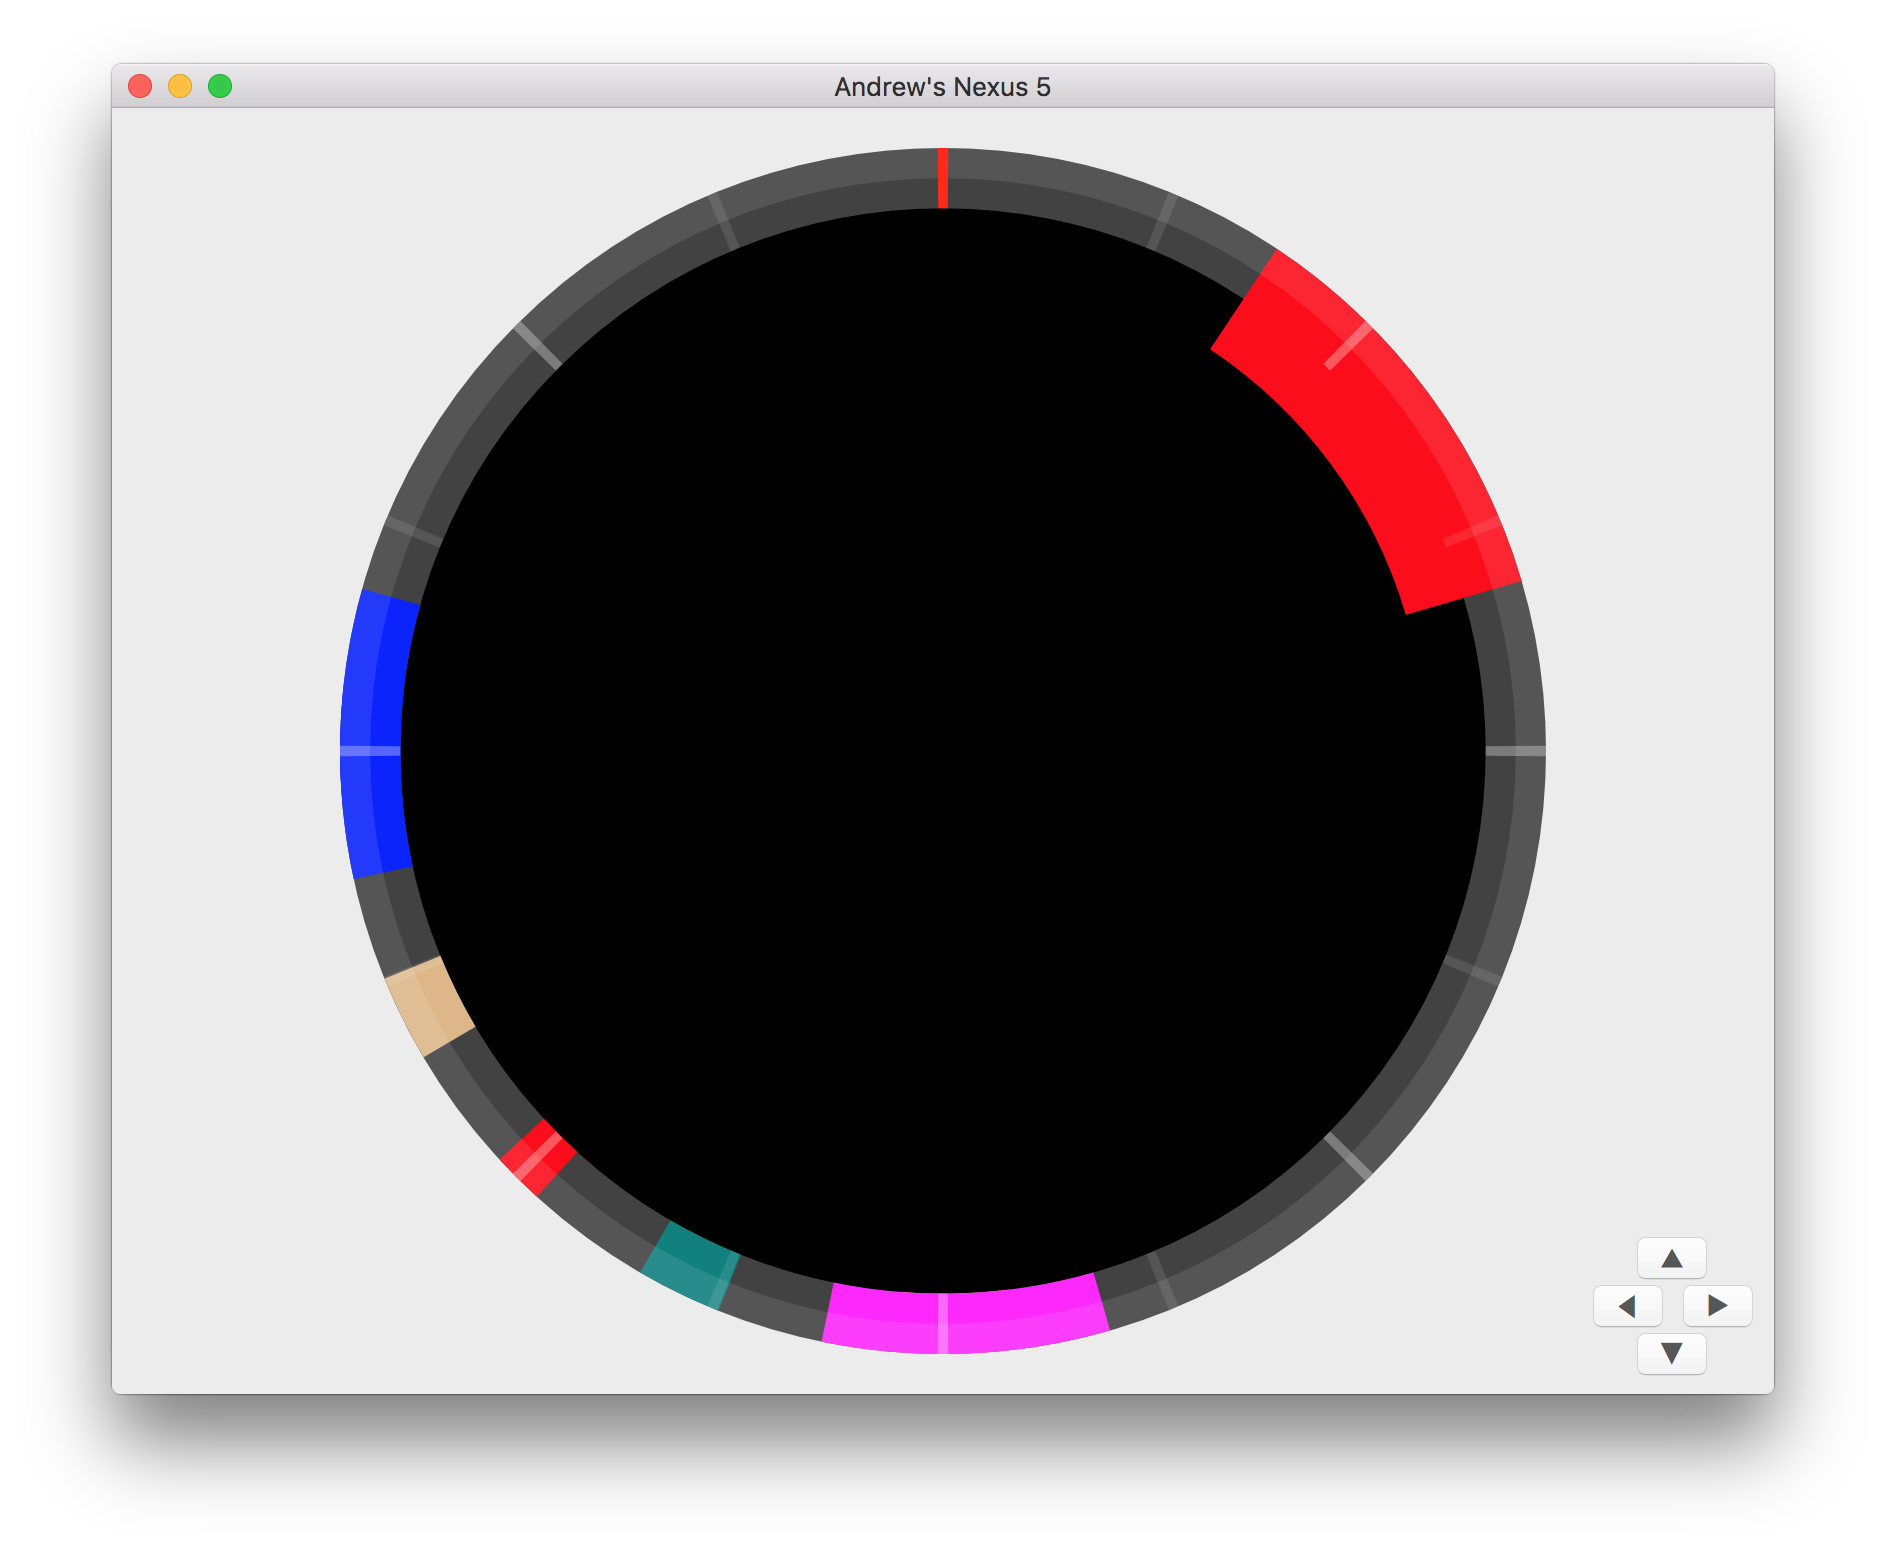
Compass
When you select a device and click the Compass button in the toolbar, it will display a compass interface similar to that shown in the Trilateral apps.
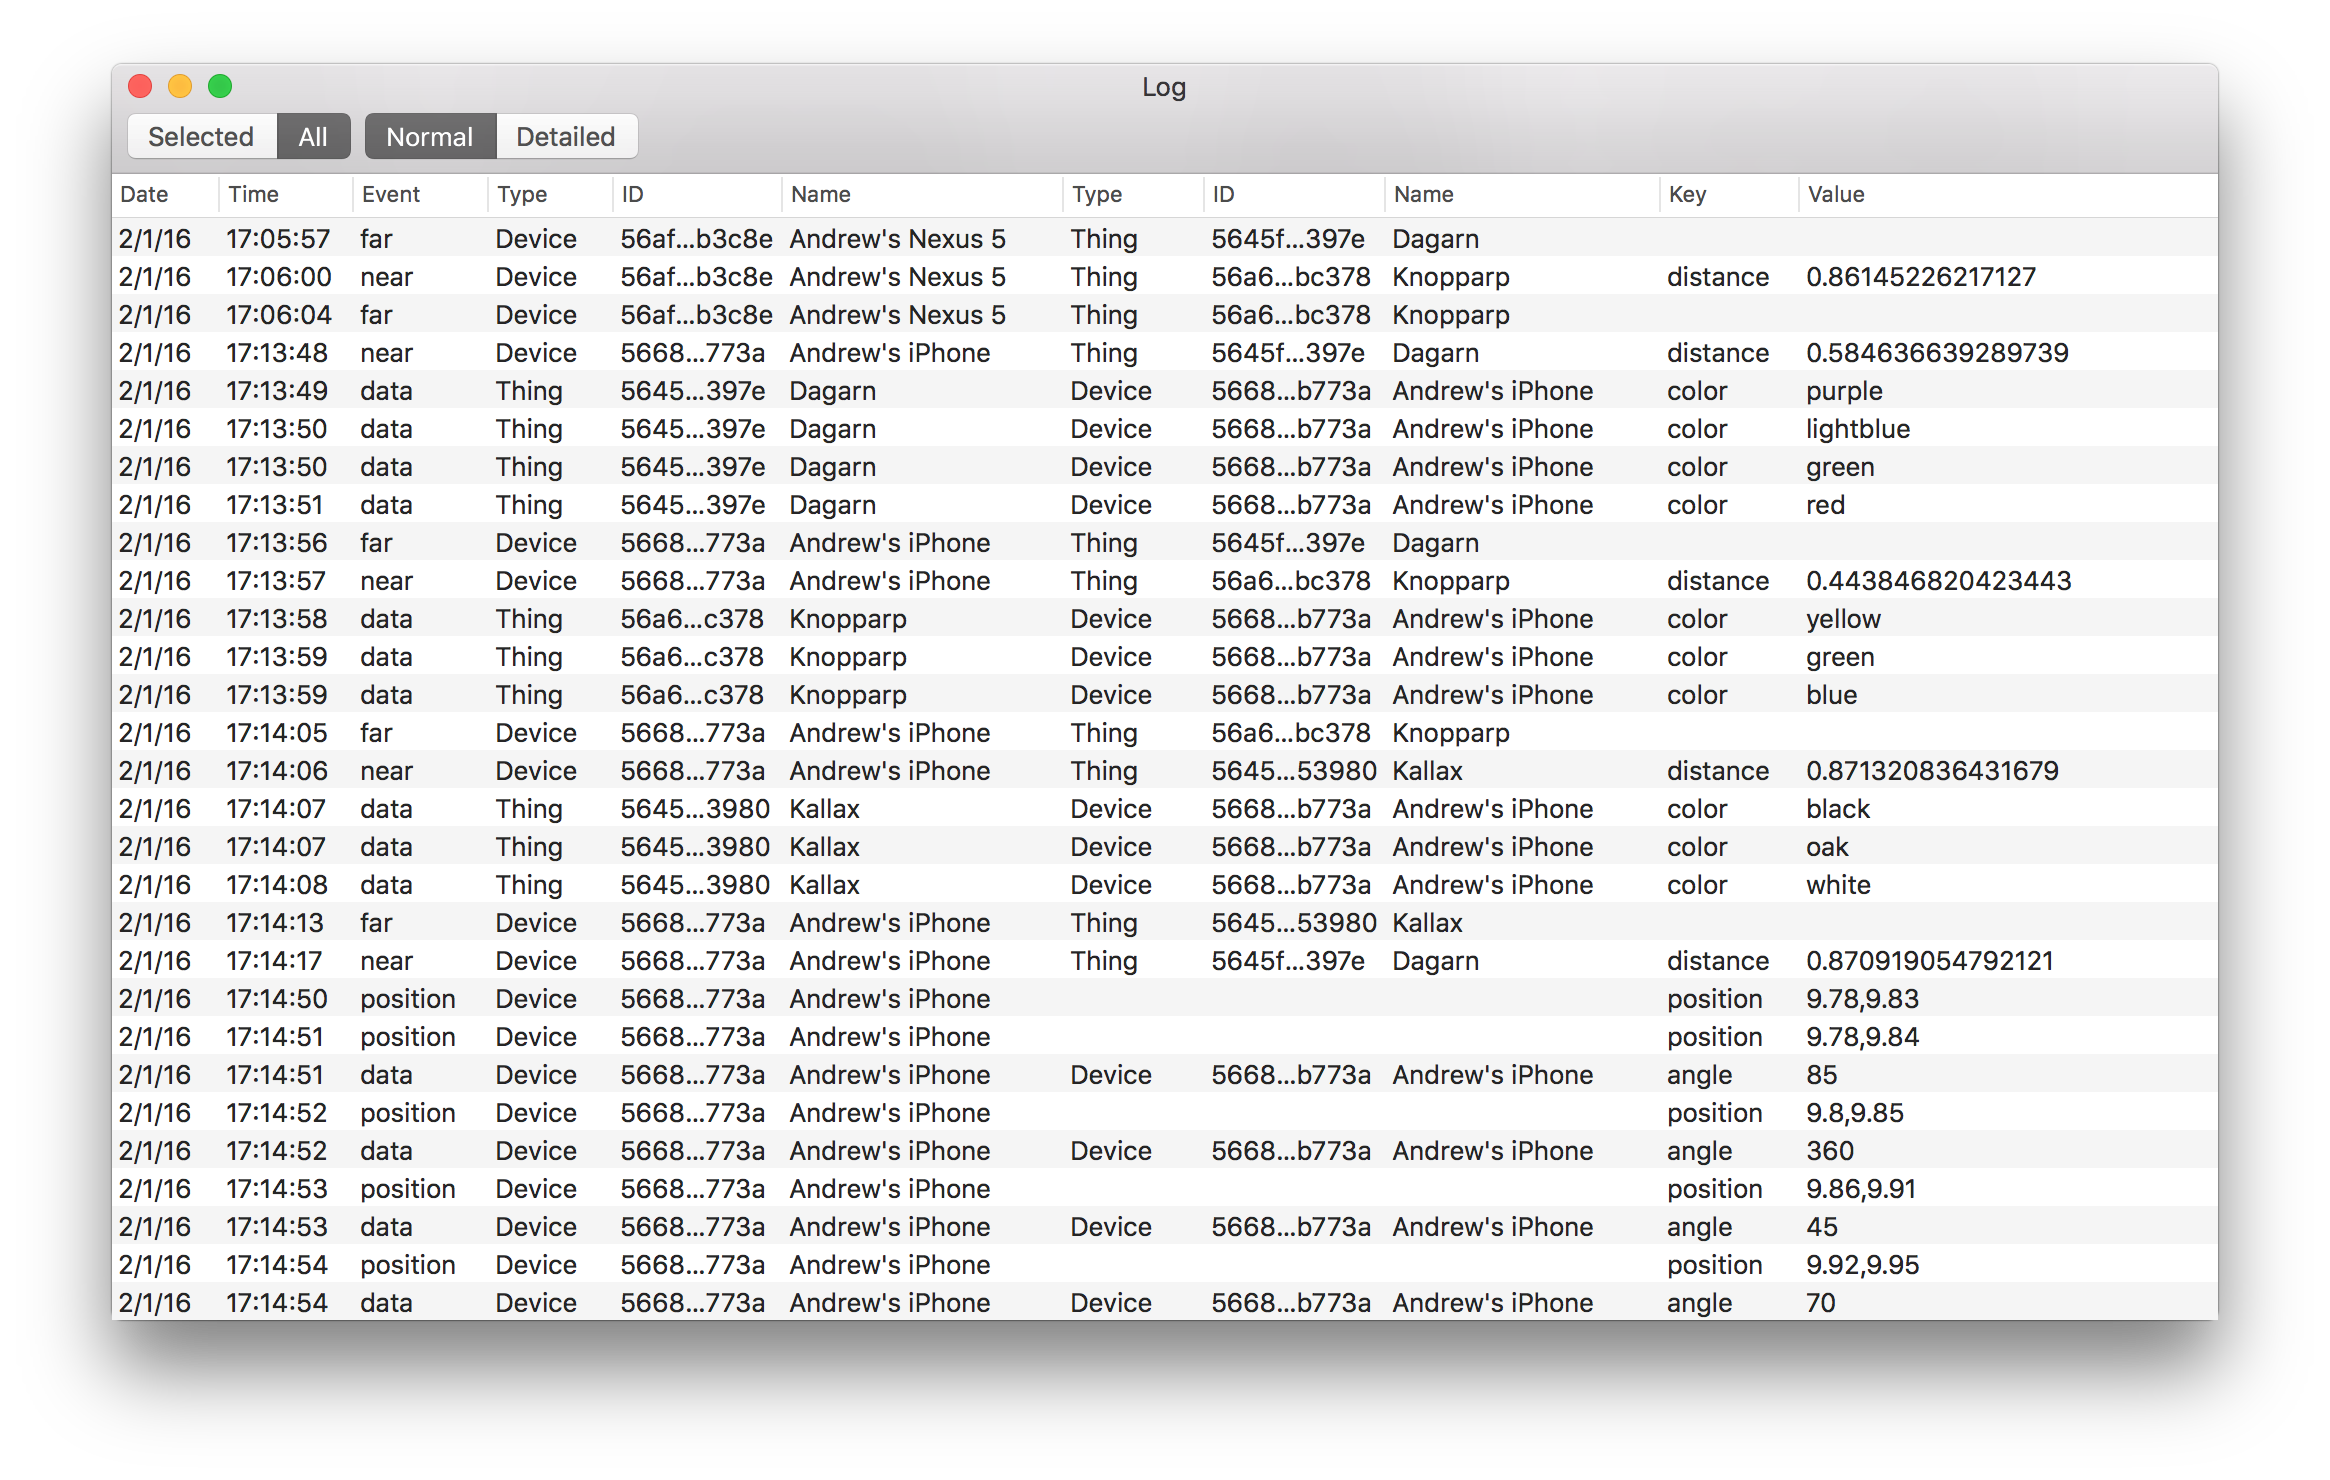
Logs
When you click the Logs button in the toolbar, it will show a window with a log of all Socket.IO messages sent and received.
- Click Selected to see log messages for just the selected object, or All to see log messages for all objects.
- Click Normal to filter out position and angle messages, or Detailed to show all types of messages.
See also
How does it all work? The Flare API page explains all the messages that are sent back and forth. If you are running the app in Xcode, you can see all the Socket.IO messages sent and received in the console.
The the Socket.IO tutorial has instructions on how to build an app with similar functionality, using the platform of your choice. The developing with Swift page has details specific to the Swift environment.