Download
If you haven't already, make sure you've downloaded and set up the Flare server. The Explorer web app is part of the web sample code, and is served by the Flare API.
Connect
If you've got the Flare server running, this part is easy! Just point your browser to /explorer/. Make sure to change the server name and port number if you are not running the server on localhost using port 1234.
Outline
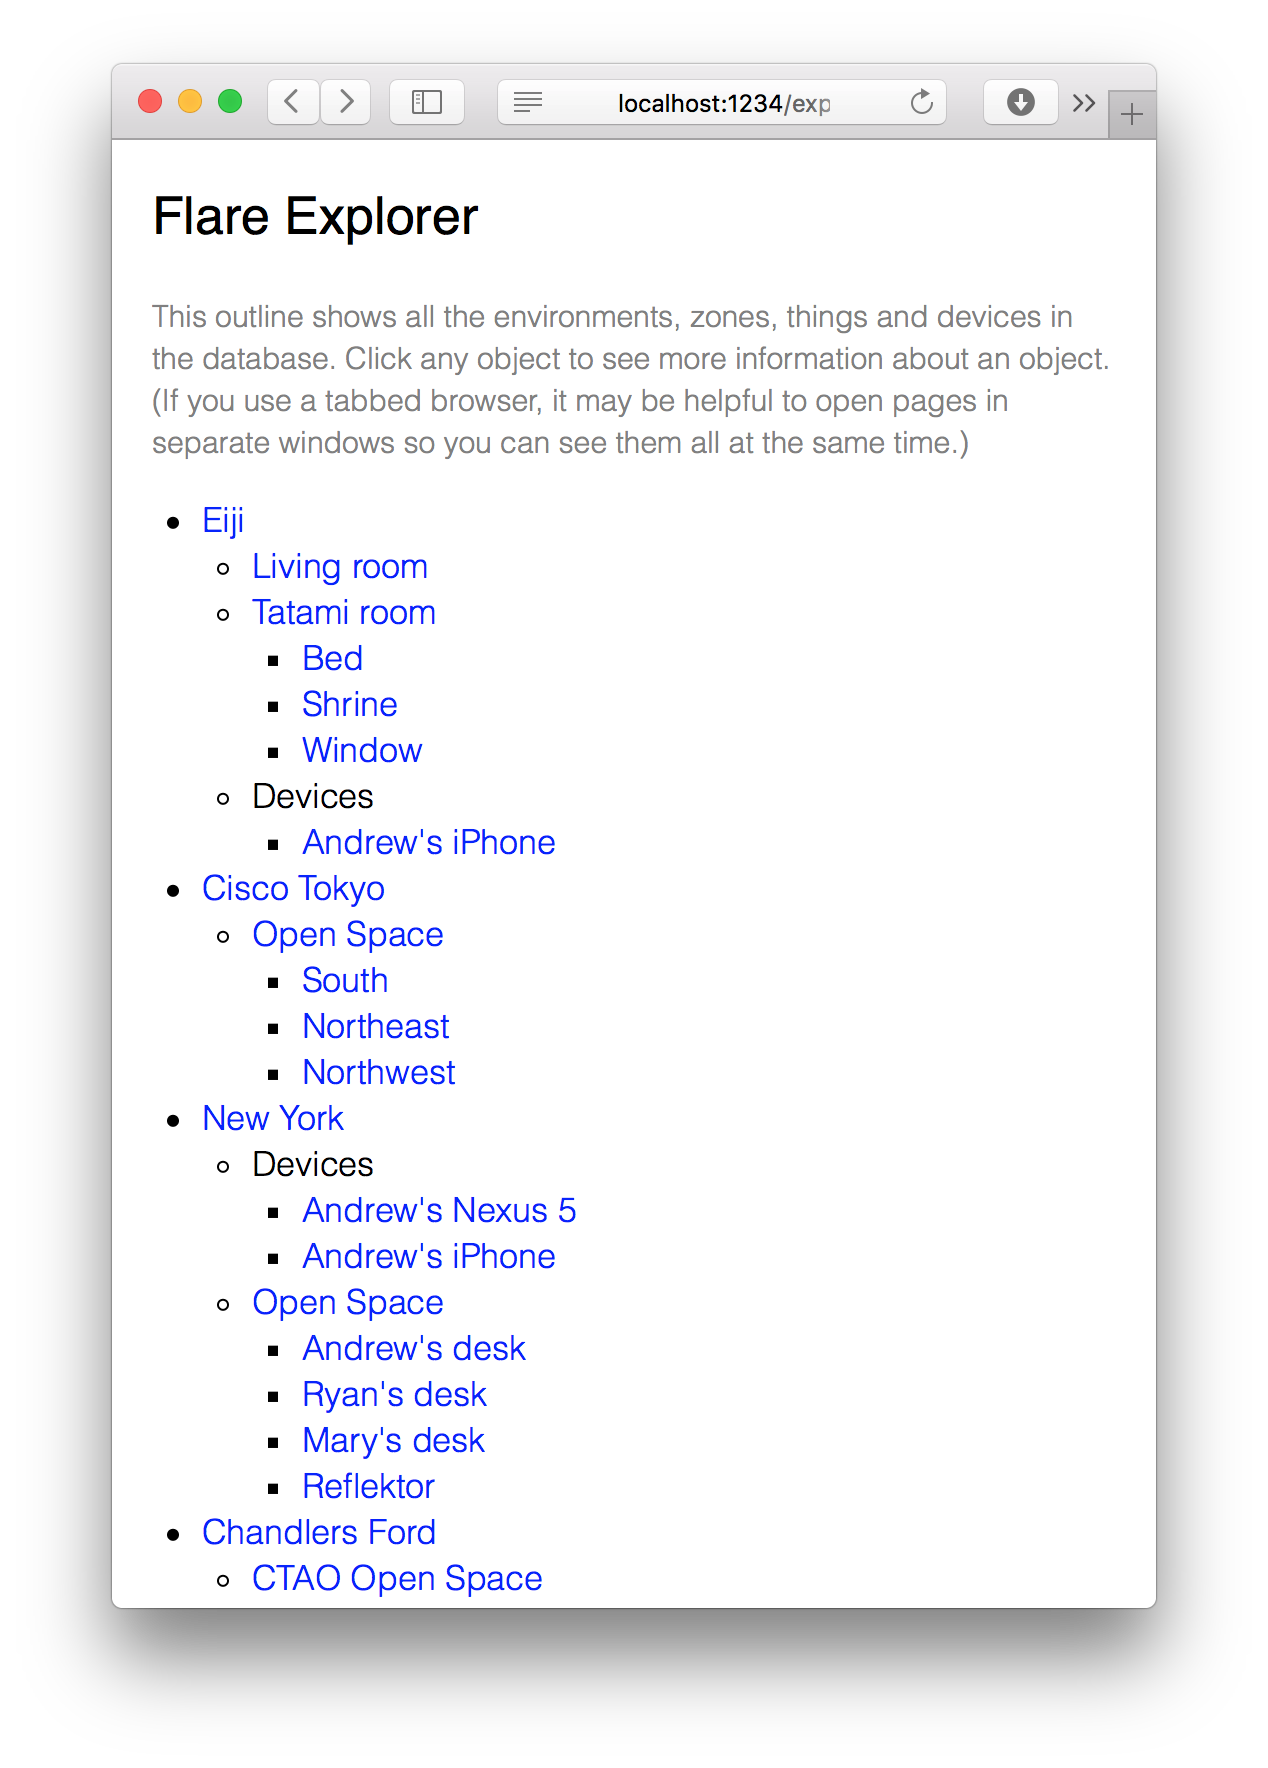
When you open the Explorer page, you will see a list of all environments, zones, things and devices in the database. You can click any object to open a new window or tab. It may help to open these objects in separate windows so you can see several of them at the same time.
Importing objects
Don't see any objects? To get an idea of what the Explorer app can do, you can start by importing some sample data. See the environments page for instructions on importing the sample objects. Then reload the page.
Creating objects
You can use the Explorer web app to create Flare objects.
- To add a new environment, click "New environment" on the page.
- To add a new zone, click "New zone" on any environment page.
- To add a new thing, click "New thing" on any zone page.
- To add a new device, click "New device" on any environment page.
See the environments page for more information about the properties of each type of Flare object.
You can also delete objects by clicking the delete object on any page.
Editing objects
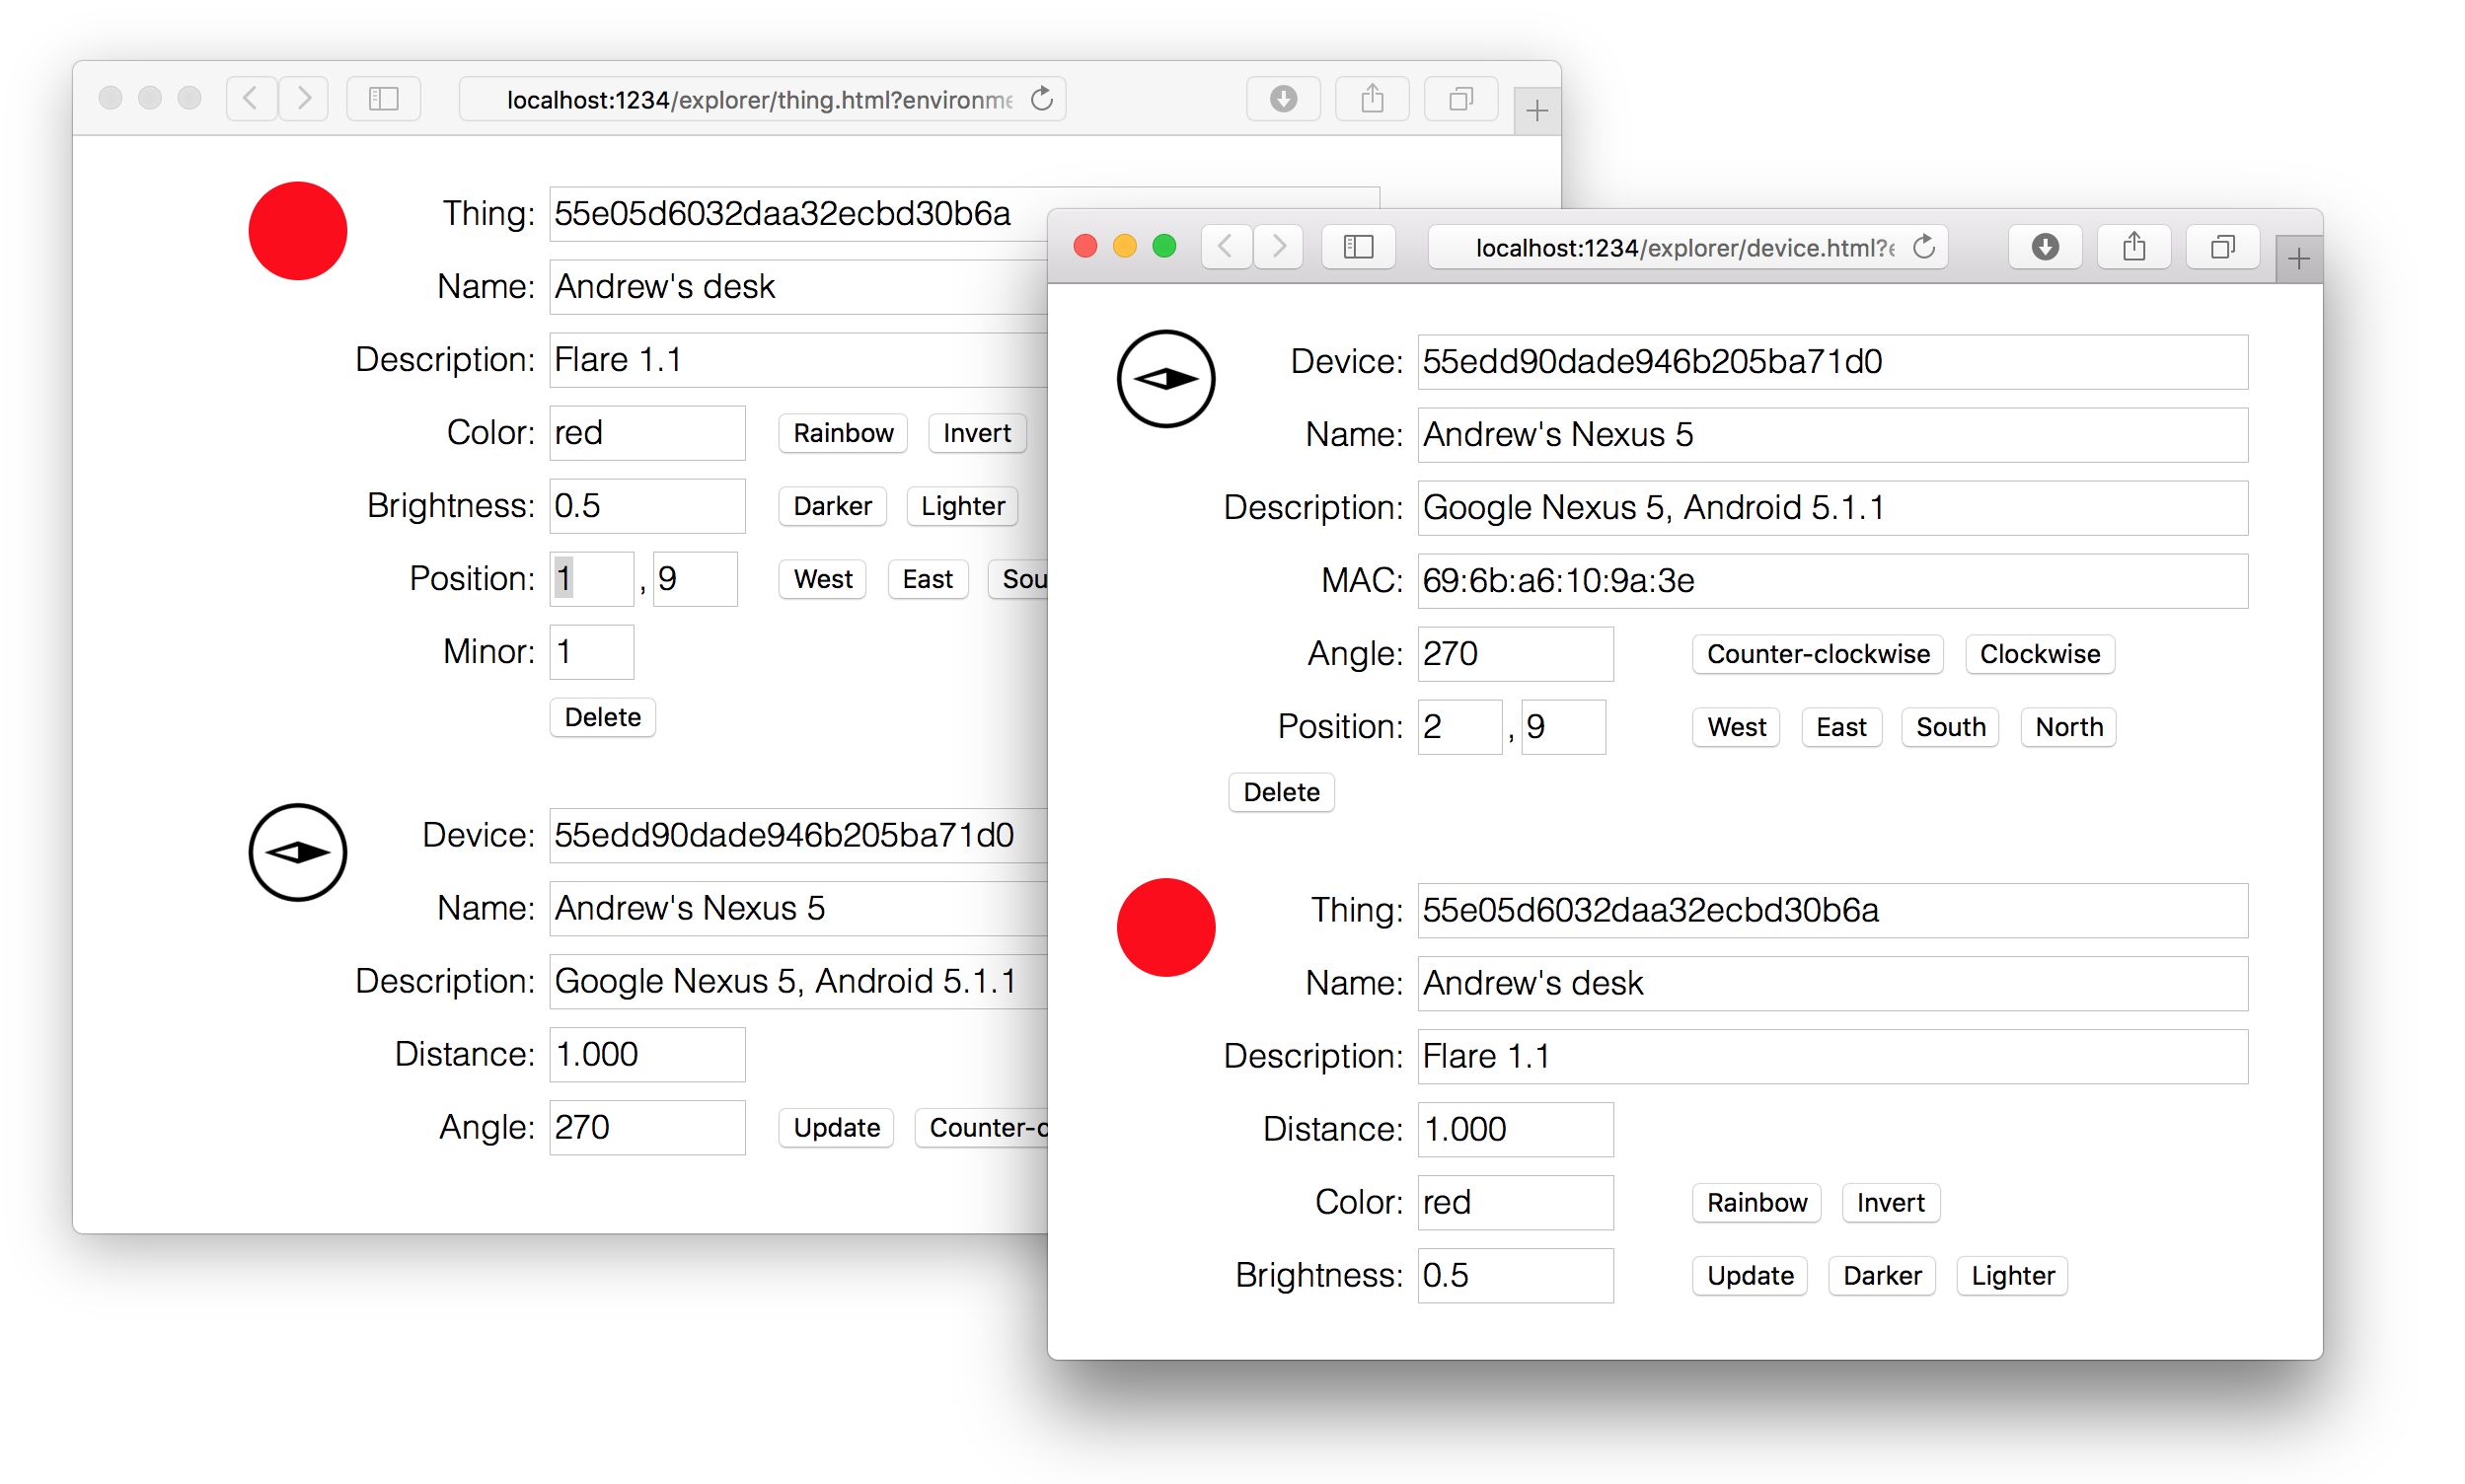
When you click on an object, it will open a window that shows information about an object, including its ID, name, description, data values, and position. Flare objects have a flexible key/value data store that can hold various objects of any JSON type. For this demo, things have color and brightness data values, and devices have an angle data value.
You can edit any of these values. When you change the name or description, or other attributes that aren't stored in the data or position objects, the app will use the REST API to update the object. When you edit the data or position, it will use the Socket.IO interface.
Basic sync
As a simple test, open two windows for the same thing. Try typing "red" or "green" into the color field, and you'll see that the data value is synchronized between the two windows. You can also set the brightness to a number between 0.0 and 1.0, or change the position coordinates.
Each time you change a data value, the page sends a setData or setPosition message to the server. Because the pages have subscribed to be notified of changes to the object, other pages for the same object will receive a data or position message whenever anything changes.
Actions
You can also perform actions on Flare objects. For example, if you click the rainbow button, it will cycle through the colors of the rainbow and you'll see the results in all open windows for the object. Similarly you can adjust the brightness with the darker and lighter buttons.
Proximity
Now try opening windows for several things and at least one device in a particular environment. Note the coordinates of all the things and the device. You can use the directional buttons to move each device around in the environment's coordinate space.
A device is considered near to a thing when it is within a certain distance, in this case at most one coordinate unit in each direction. For example, a device at (2,3) is considered near a thing at (3,4). When a device moves near to a thing, they will become paired. The device will show information about the thing, and the thing will show information about the device. You can modify the data values and click the action buttons, and you'll see the results all synced up. When they move apart, they will be unpaired.
Conclusion
In this short demo, you've seen how a device can discover things in its environment, find out when it is near a particular thing, synchronize data values in both directions, and perform actions.
See also
How does it all work? The Flare API page explains all the messages that are sent back and forth. You can also bring up the JavaScript console on the page to see all the messages as they are sent and received.
The the Socket.IO tutorial has instructions on how to build an app with similar functionality, using the platform of your choice. The developing with JavaScript page has details specific to the JavaScript environment.